If you’re out exploring you’ll have to get off your skis one day. But how best to carry them, and have you mastered the badminton swing and front-point with your axe and crampons? Martin Chester gives a masterclass on skills for safe hiking up high
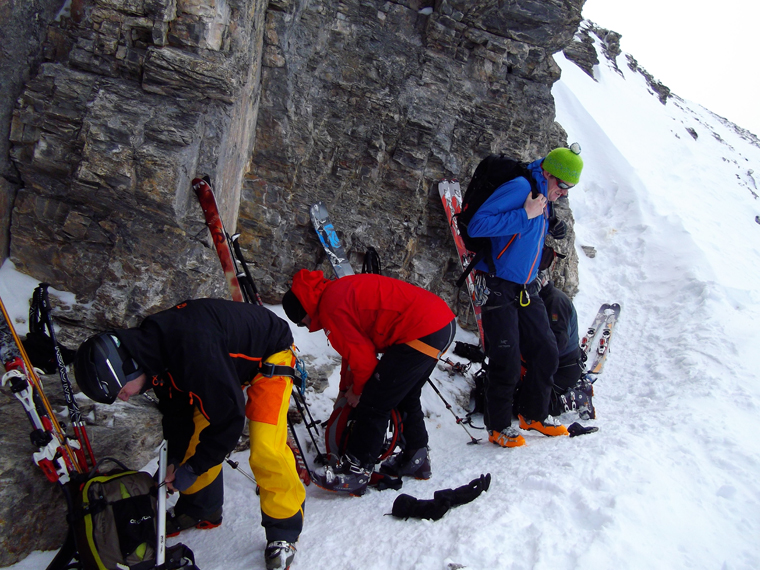
The swift-fix pair stash
If you only have a quick boot-up to contend with, you want something quick and efficient. Otherwise, you’d be better off carrying your skis over your shoulder. The deciding factor is often the terrain – if you need to use your hands to make progress, the quickest methods involve racking the skis together and stashing them in a pair. For this, the most common options are:
- The snowboard rack. Many ski and board packs have a panel down the back with a couple of quick-release straps. In our world of gizmos, many of these straps are built into integral panels and fancy webbing. But the result is good – clip your skis together, clip them in and you’re good to go. The result is a vertical carry that needs to be quite high to avoid snagging the back of your legs on the ski tails every step. Trust me – three steps will be enough with your ski tails pummelling your calves. Too high, and the whole thing gets wobbly; too low and your calves won’t be thanking you. A word of warning – even the best-designed pack will feel wobbly if it’s not full to the brim.
- Under the lid. If the terrain is not too steep, so you don’t need to be swinging your ice axe around, you can simply slot a pair of skis across the top of a ski pack under the lid. Now forgive me for stating the obvious, but this requires your pack to have a lid, which is likely if you are a mountaineer, but less likely if you have a freeride pack.
- The purpose-built ski stash fitting. These come in all shapes and guises, but my favourite is the wire loop on the back of the Scott RAS pack. It disappears when you don’t need it, and extends when you do. Slot the tails in, clip the buckle above and away you go. This type of system carries the skis across the pack diagonally. Great for most situations, but when you’re traversing a ridge, the tails can do your head in if they catch on the slope behind. Try to match the angle you use to the terrain. I carry a spare strap so I can twist the skis and tweak the angle.
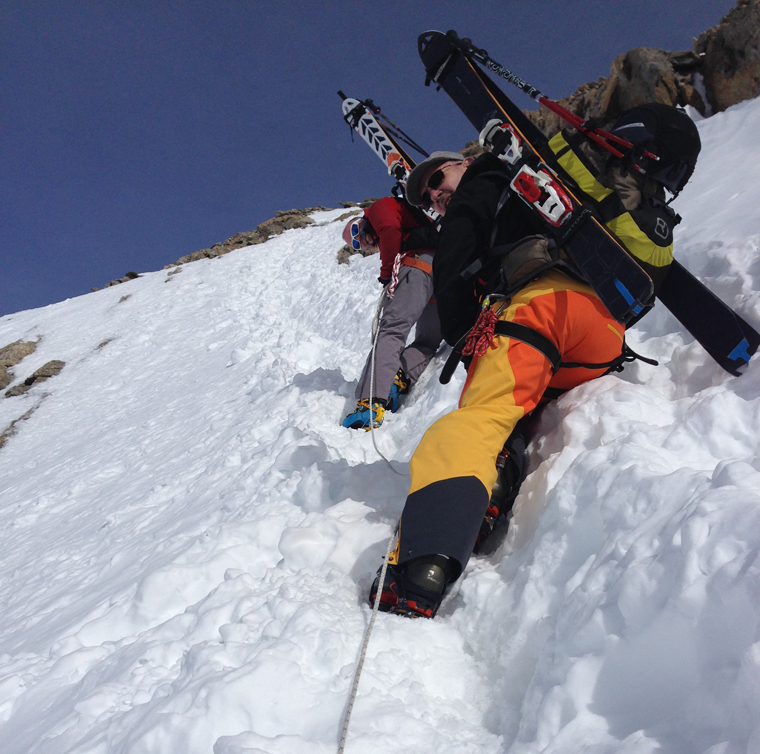
The classy a-frame
The diagonal ski carry works well on a full pack as long as you have enough straps to secure the skis and poles. This is important if you are climbing with your axe(s). But on a long carry, the skis are way back on the pack, which can exert quite a pull on the shoulder straps.
Hence, most prefer to opt for the A-frame. We’ve all seen it in the pics, we all think it looks cool, and I’ve never met a skier who didn’t feel like ‘Jack the biscuit’ the first time they got to stand on a snowy summit with their skis neatly stashed along each side of their pack. But it’s not quite as simple as just lashing them on…
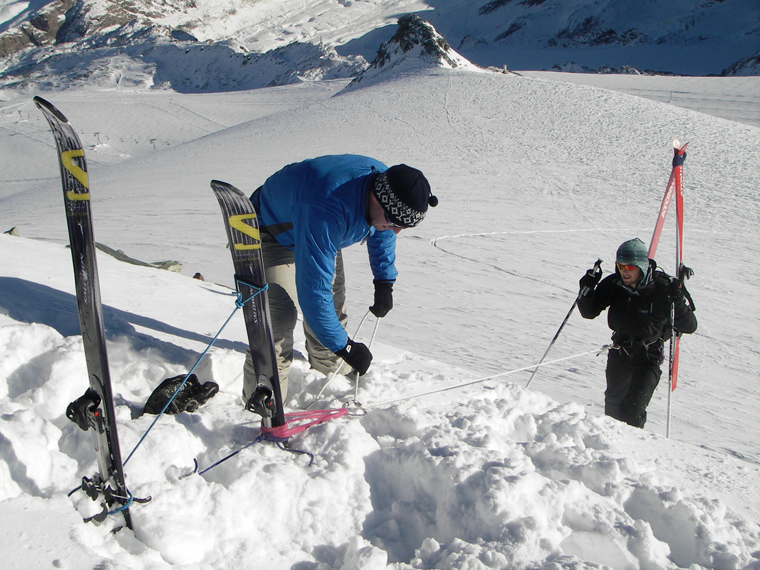
- A good ski pack will have purpose-built straps at the bottom of each side to allow a speedy stash of the ski tails. Look for this feature when you buy. Slide the ski tail in down to the level of the binding: the more the binding sits on the strap, the more secure the fix will be. The top straps on each side will be far away enough to accommodate the binding length, and should ideally sport a quick-fix clip for rapid fastening and adjustment. Again, check the speed and range of adjustment when you shop. Put the skis too low, and the tails will be forever catching in the snow behind you. Too high and the whole thing feels like some crazy unstable radio mast.
- Take an extra ski tie. Bringing the tips of the A-frame together does two things: it makes the whole thing way more solid, and splays the tails apart to stop them knifing the back of your calf muscles. Carry a long ski tie (Velcro is fine if it’s new) and make sure it will go round both ski tips and poles.
- Finally, make sure you have everything you need from your pack before you load your skis. There’s nothing funnier than watching your mates set off, then wrestle with this confounded structure as they try to retrieve their crampons or sunnies.
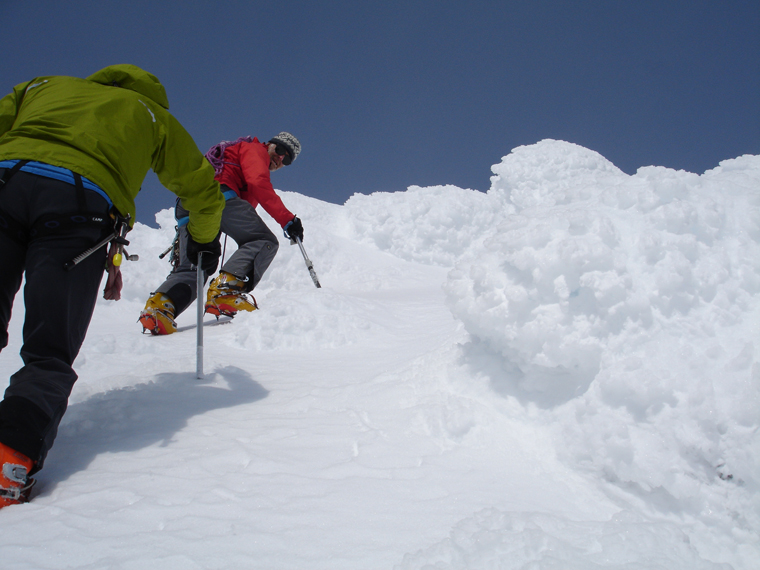
Using an Axe and Claws
The ice axe is like the crampons. Alloy is light, but feels like a fragile toffee hammer when the going gets serious. Proper ice axes are tools that deserve a name. The only acceptable compromise here is to save weight on the shaft, while going for a robust (and ideally one piece forged) head and cutting edge. I go for the longest I can fit in my pack: 50cm seems an ideal compromise.
- Mostly we use the axe like a walking stick, ready to stop a slip becoming a slide. When it steepens up, we need to learn to swing the tools. Pick velocity is everything, so think more badminton than tennis serve, with a speedy flick at the end. If you’re not happy, swing again in the same spot.
- When it gets rocky, poke and probe for cracks. You wouldn’t rock climb by poking with your fingers in the hope they might stick, so don’t do the same with your ice axe. Prod, scrape and seek, hooking the holds and cracks. Then use this for balance only as you concentrate on your footwork…
- When front-pointing crampons in ice or hard snow, keep your heels relaxed and horizontal. This is easier in ski boots than mountaineering boots. Try to keep your feet square on to the surface, and avoid splaying them out like a duck.
- When using crampons on rock, seek out cracks and ledges as you would when climbing in boots. Wobbling around on a single point feels pretty scary, so think of the front points of your crampons as claws. Try to get a sturdy pinch grip of any edges, ledges, cracks and protuberances.
Once at the top…
At last, the summit! All being well, you’ll find a safe platform to reverse the procedure and get back on your skis. If you’ve climbed the route of descent, you know what you are in for. If not, think about keeping the rope on as one of the team goes down and checks out the snow. If you need to abseil, do so carefully, and put knots in the ends of the rope. Many mountaineers have made the rooky blunder of zipping off the end…
In the absence of a natural feature to sort your kit, use your shovel. All that snow is infinitely malleable, and it won’t take long to whittle a comfy platform. Get organised, get sorted, get it all packed away and reap the rewards of your efforts. Chances are you are now in situ for first tracks in the deep and delicious. Enjoy! FL

